
Welcome to the second installment of Let's Learn Portraiture! The previous installment was about Model Communication. For this installment, we will be tackling a topic for those photographers who enjoy taking portraits outdoors.Portraiture with Natural Lighting
1.) Avoid Direct Sunlight

While it can really bring out the color of the eyes and make them pop, having your model stare into the sun should never be on the agenda. Not only is it exceedingly uncomfortable for your model, but it casts very harsh shadows. In most cases, you want to position your model with the sun behind them, or to the side.This will illuminate the hair and offer a nice glow. The issue then is that the subject's face may be too dark (underexposed). To solve this, you can bounce some light back into their face with a reflector or flash, or you could make the photograph brighter (overexpose), by using a larger aperture (smaller number), a slower shutter speed (speed at which the shutter opens and closes), or a higher ISO (camera's sensitivity to light).
Many photographers when they're starting out make the mistake of placing their subject directly in the sun, because of how well lit the subject is - but the pain and discomfort they'll endure is not worth it.
2.) Watch Your Horizons
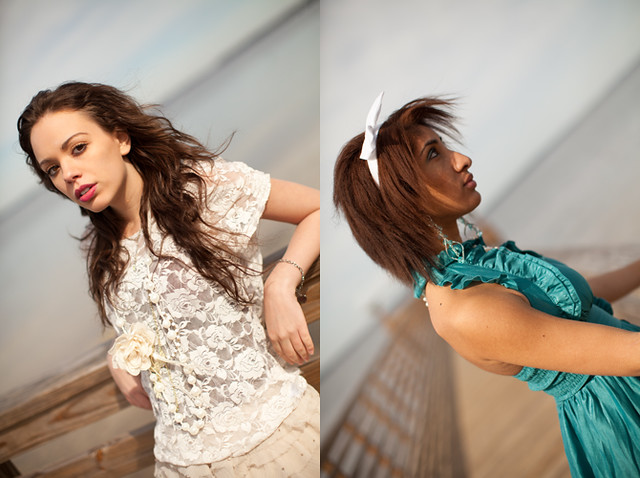
For those of us who do not have their camera mounted on a tripod, you may find yourself tilting your camera every which way as you explore various angles. Angles like those seen above are commonly referred to as 'dutch angles,' is a way to show motion, and is typically used to demonstrate uneasiness or tension in cinema. This is a stylistic choice, but the main thing to consider here is that more often than not, you want your horizons (the ocean in these examples) to be straight. Leaving them at a harsh angle as shown here can be very distracting in your portraits.
3.) Watch for Highlights & Shadows
When shooting outdoors, especially in harsher lighting, you run the risk of casting shadows or highlights on your subject's face. In this example, the model's hair is casting these shadows. To solve this, you'll want to position your model away from the source of light, so simply having them turn or moving them to a different location can fix this. Bouncing some light into their face with a reflector or flash can also help neutralize shadows and highlights.
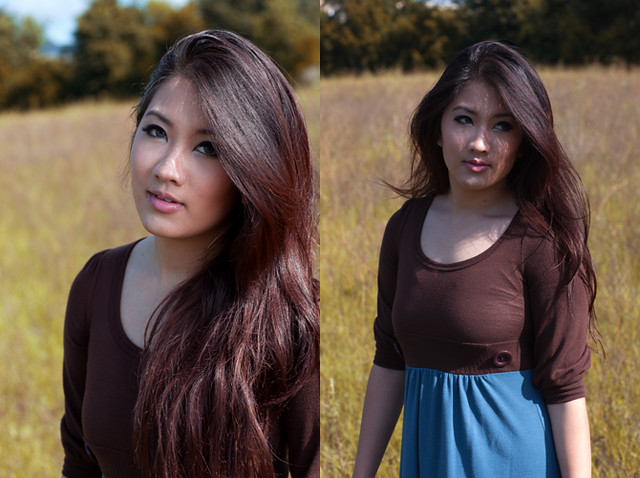
4.) Seek Shade
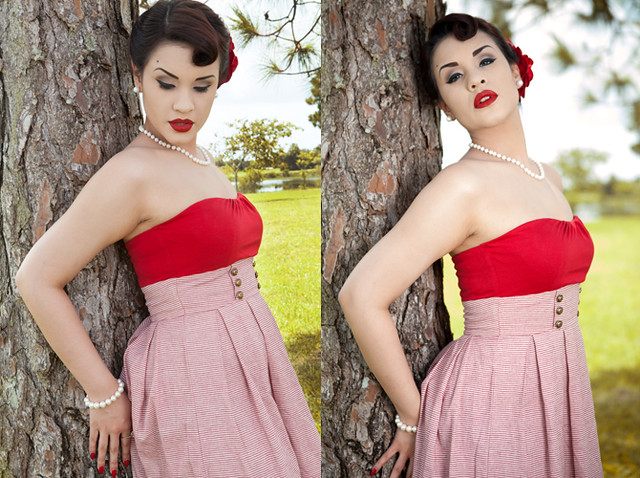
On many occasions, portraits shot in harsh lighting will not be as flattering as those shot in the shade. As demonstrated here, the portrait on the left has much truer colors, more detail, and softer lighting that is overall very flattering. On the right side, the colors are more exaggerated and warm, and many of the details are washed out such as the model's make-up and facial features. Not only will being in a shaded area improve the photograph, but it will also make it much easier to compose and review your photographs without the harsh sunlight limiting visibility through the viewfinder.
When you're shooting in a location that may not offer any shade, you can help to diffuse the light by using what's called a scrim. A scrim is a translucent gauze or screen that you can fasten to a frame, to be held between the model and the intense light source to help soften the light.
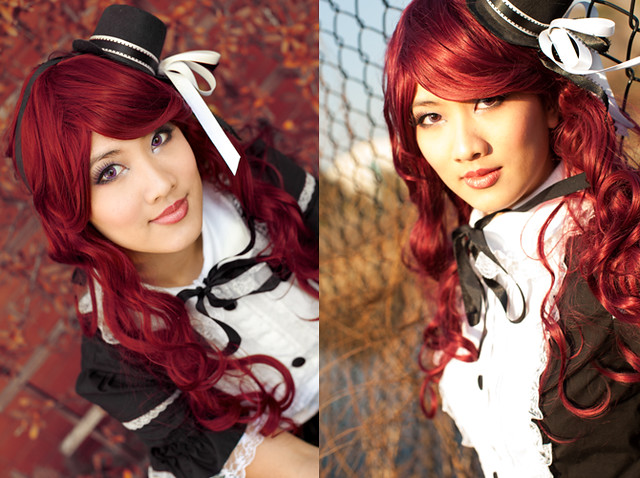
5.) Use a Reflector
The photograph on the left is properly illuminated with the use of a reflector, while the one on the right has noticeable shadows without the use of one. Bouncing light into your photograph to help eliminate shadows is called a 'fill light,' and can be done with a reflector or a flash (strobe). Reflectors are by far the most economical choice, for you can use a piece of white foamcore board for several dollars that will do the job. Even a nice multiple reflector kit from a brand like Lastolite will only run you $50. Flashes and strobes are a much bigger investment, though they definitely offer many benefits as well.
The downsides to using a reflector are that it will often require having someone hold it, and you can only reflect what light is available to you. Stands are available that can hold your reflector for you, but they're very unrealistic outdoors due to wind, as well as the need to adjust their position. Flashes and strobes generate their own light, and while it's easier to have a helping hand to arrange your lighting, it can be done by the photographer single-handedly. For cost effectiveness and simplicity, reflectors are typically the way to go.
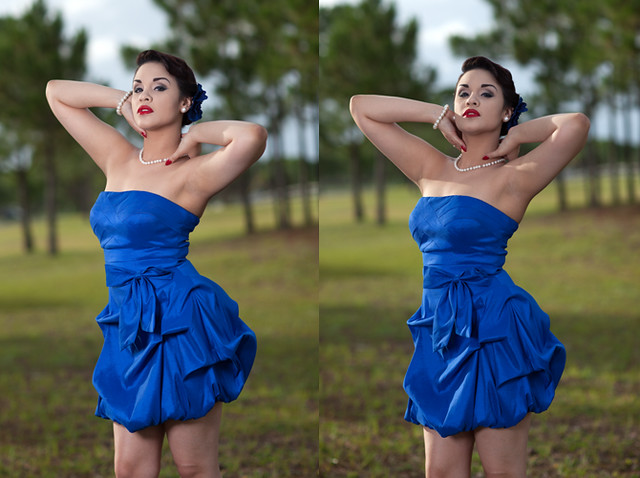
6.) Experiment with Depth of Field
There is no right or wrong way to use depth of field (the area of your photograph that appears in focus) in portraiture. A small (shallow) depth of field will mean that your subject will be mostly in focus, while the foreground and background will be blurred and out of focus. A large depth of field will show much more detail, and leave your subject, foreground, and background in sharp focus. In the above image, the photograph on the left has a larger depth of field, showing a sharper, more detailed background. The photograph on the right has a much shallower depth of field, therefore blurring the background. There are times where you will want to have equal emphasis on your subject and the background, and there may be others where you want the emphasis to only be on your model. In portraiture, using a shallow depth of field is more common, as you never want your background to compete with your subject.
To adjust your depth of field, you have to change your aperture (lens opening) setting. A larger (wide) aperture is represented with a smaller number (f/1.8, f/2, f/2.8), while a smaller aperture is represented in larger numbers (f/9, f/11, f/16). The larger the aperture, the shallower the depth of field. The smaller the aperture, the larger the depth of field. You can change your aperture by using the Aperture Priority Mode, or Manual Mode on your camera. A shallow depth of field is desirable for those that love blurry backgrounds with a lot of bokeh (aesthetic quality of the blur). Experiment with apertures in your portraiture to see what style you like for your portraits, and keep in mind that different lenses will have different possible apertures.
7.) Experiment with Lens Flare
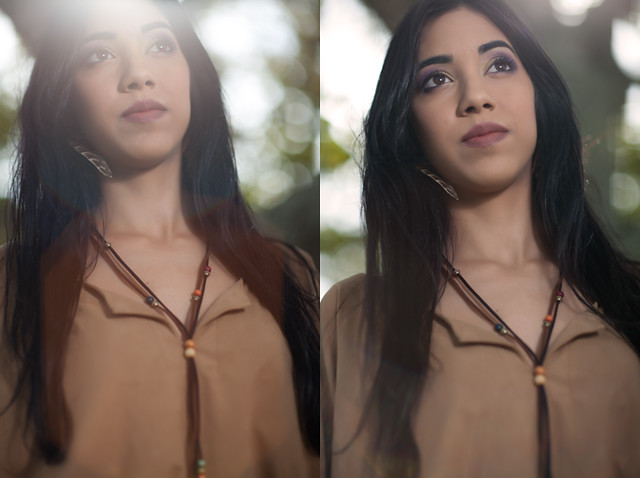
Lens flare is quite common in outdoor portraiture, and is entirely a stylistic choice. Different lenses will have different lens flare effects. To achieve lens flare, you simple aim your camera at the sun's light, which is more achievable shortly after sunrise or before sunset. You'll want to avoid using a lens hood if you're aiming for lens flare, as they are typically designed to limit lens flare.
Alternatively, lens flare is not usually a desirable effect in photographs, so if you're purposefully avoiding it, you can use a lens hood, a reflector held above you, use your hand to block out the flare (not very convenient), or make a DIY lens hood to extend past the lens. One note to bear in mind, is that lens flare can be easily added in post-production with software like Photoshop. It is not as simple to edit out an accidental lens flare in your photograph, so be mindful of whether or not it will really add a desired effect to your portraits. Personally, I try not to use lens flare as it can be notoriously difficult to work with, but it's all a matter of taste in the end.
Thank You For Reading!
I hope that you have enjoyed the second installment of Let's Learn Portraiture! Please do leave any feedback or questions in the comments, and feel free to suggest any topics for future tutorials! Kendra-Paige